AI HTML Widget for BigCommerce
What is the AI HTML Widget?
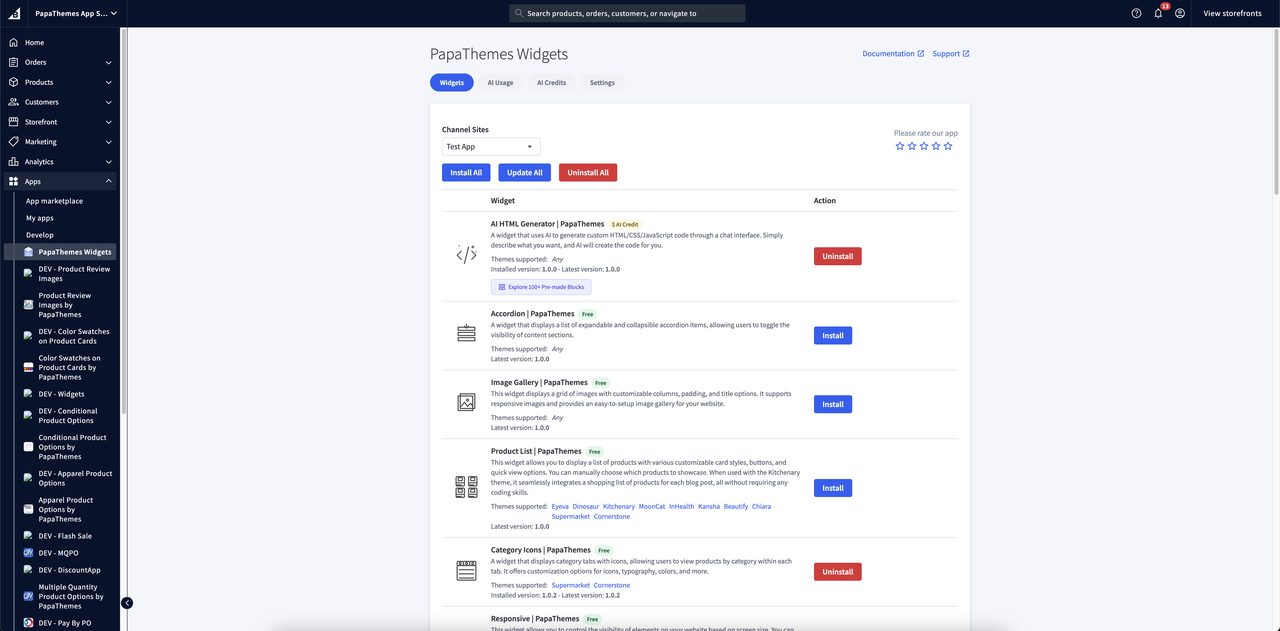
The AI HTML Widget lets you create custom HTML, CSS, and JavaScript content for your BigCommerce storefront using AI. Simply describe what you want in plain language and the built-in AI chatbot will generate production-ready code, automatically applied to your page.
Page Builder Name: AI HTML | PapaThemes
Version: 1.0.0
Features
- ✅ AI-powered code generation via conversational chat
- ✅ Real-time streaming responses
- ✅ Multiple AI models (Mini, Standard, Max)
- ✅ Code version history with navigation
- ✅ Image paste support for visual reference
- ✅ Page screenshot capture for style matching
- ✅ Persistent chat history (with subscription)
- ✅ Automatic CSS/JS scoping to prevent style conflicts
- ✅ Responsive chatbot sidebar
- ✅ Pre-made blocks gallery with instant preview and device frames
How to Create Content with AI
1. Add Widget
- Open Page Builder in your BigCommerce admin
- In the widget panel, find AI HTML | PapaThemes
- Drag and drop it to the desired location on your page
- The widget displays with default welcome content
2. Open the AI Chatbot
- After adding the widget, a purple AI button appears at the bottom-right corner of the page
- Click the AI button to open the chatbot sidebar
- The sidebar slides in from the right with a chat interface
3. Generate Content
- Type a description of the HTML content you want in the input box
- Click the Send button (or press Enter)
- The AI generates complete HTML/CSS/JavaScript code
- Code is automatically applied to your widget on the page
- A version entry is created so you can go back later
4. Refine Your Content
- Send follow-up messages to refine or modify the generated code
- The AI remembers your conversation context and previous code
- Each change creates a new version you can navigate
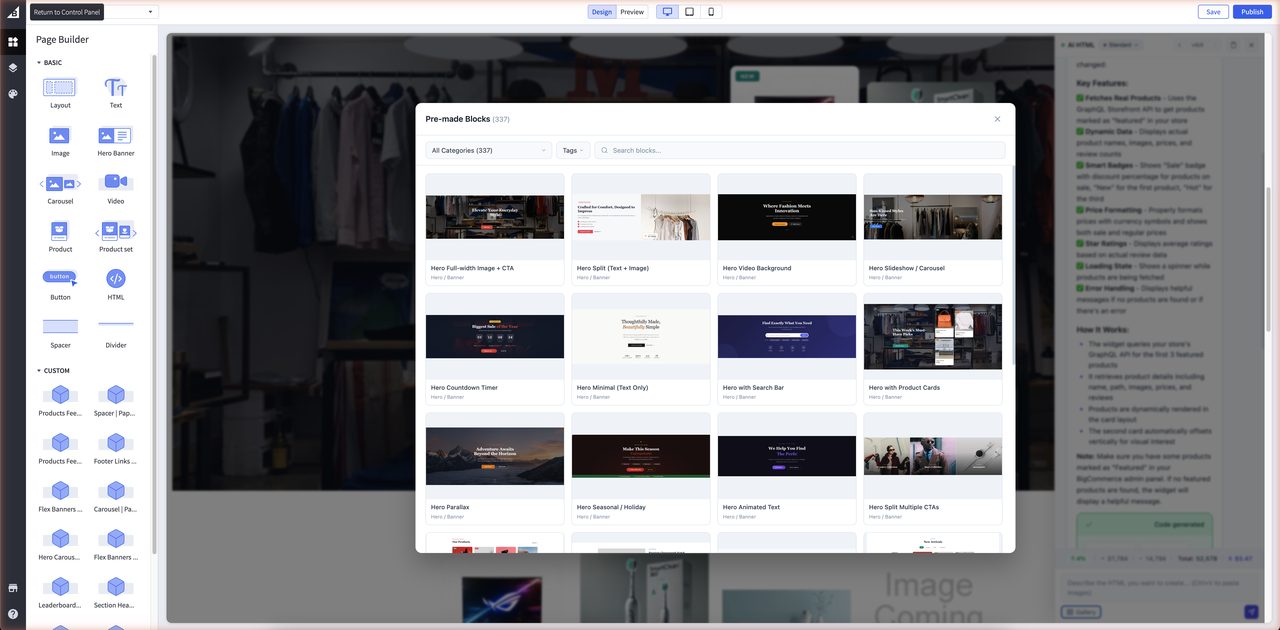
Pre-made Blocks Gallery
Instead of starting from scratch, you can browse a gallery of ready-made section templates and apply them to your widget with one click. After applying, use the AI chatbot to customize the block to match your store.
Opening the Gallery
- Open the chatbot sidebar
- Below the chat input, click the Browse Blocks button
- The gallery opens as a full-screen modal overlay
Browsing Blocks
The gallery displays blocks in a responsive card grid. Each card shows a desktop screenshot, the block name, and its category.
Filtering
| Filter | How to Use |
|---|---|
| Category | Select a category from the dropdown. Each category shows the number of blocks it contains (e.g., Hero Banners (12)). Select All Categories to show everything. |
| Tags | Click the Tags button to open a multi-select dropdown. Select one or more tags to narrow results — only blocks matching all selected tags are shown. Use the search field inside the dropdown to find tags quickly. Click Clear all to reset. |
| Search | Type in the search field to filter by block name, file name, keywords, or description. Results update as you type. |
All filters work together. For example, you can select a category, add tags, and type a search query at the same time.
Infinite Scroll
Blocks load progressively as you scroll down — 24 blocks per batch. When you reach the bottom, the next batch loads automatically. A scroll-to-top button appears in the bottom-right corner after scrolling down, letting you jump back to the top.
Previewing a Block
Click any card to open a lightbox preview with full-size screenshots and device frame simulation.
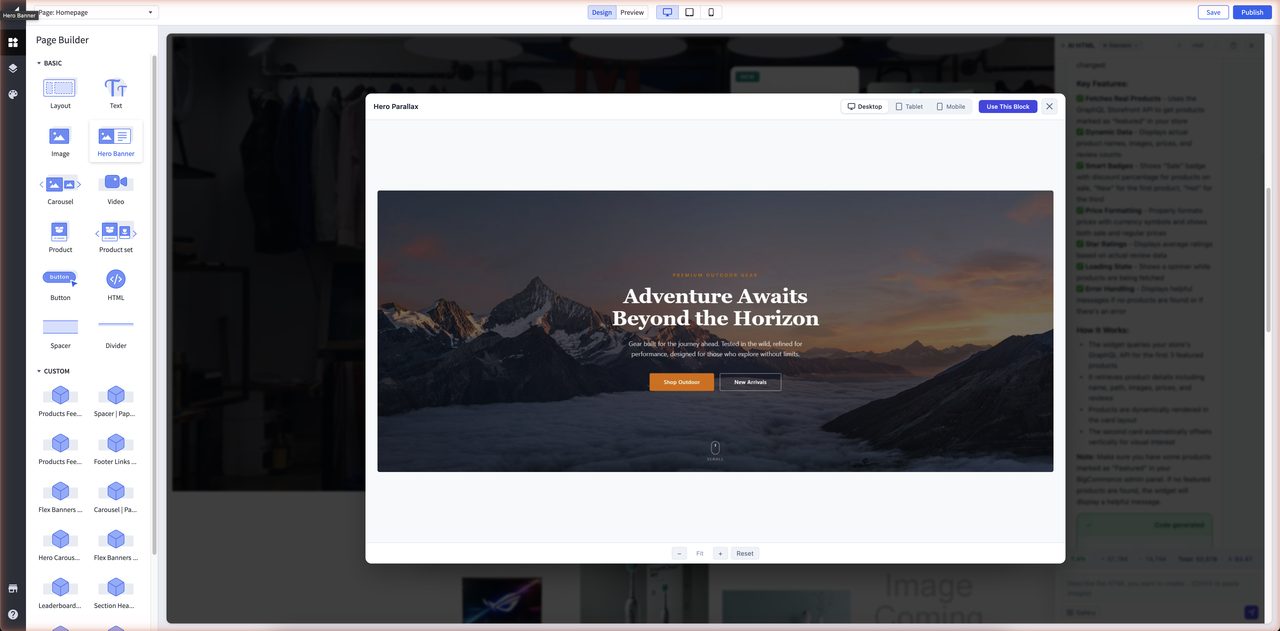
Device Frames
| Tab | Description |
|---|---|
| Desktop | Full-width screenshot, no frame |
| Tablet | 768px width with an iPad-style frame |
| Mobile | 375px width with an iPhone-style frame |
Click the tabs in the lightbox header to switch between viewports.
Zoom Controls
| Control | Action |
|---|---|
| − / + | Zoom out / zoom in through predefined steps (50%–300%) |
| Reset | Return to fit-to-container mode |
| Ctrl + scroll | Zoom in/out with the mouse wheel |
Applying a Block
- In the lightbox preview, click Use This Block
- The block's HTML is fetched from the server and applied to your widget
- A new version is created in the version history
- The gallery and lightbox close automatically
- An inline notice appears in the chat: "Block Name applied! Tell me what to customize."
After applying a block, you can use the AI chatbot to customize it — change colors, text, layout, images, or any other aspect.
Tip
Pre-made blocks are a great starting point. Apply a block first, then tell the AI what to change — this is often faster than describing an entire design from scratch.
Browse the full template catalog
See the Section Templates Gallery for a visual catalog of all 44 form and popup templates with screenshots and descriptions.
Chatbot Interface
Header
| Element | Description |
|---|---|
| Status Dot | Green pulsing dot indicates the chatbot is ready |
| Model Selector | Dropdown to choose AI model (Mini / Standard / Max) |
| Version Navigation | Arrow buttons to browse previous code versions (e.g., v1/3) |
| Clear Button | Trash icon to clear chat history (with confirmation) |
| Close Button | X icon to close the sidebar |
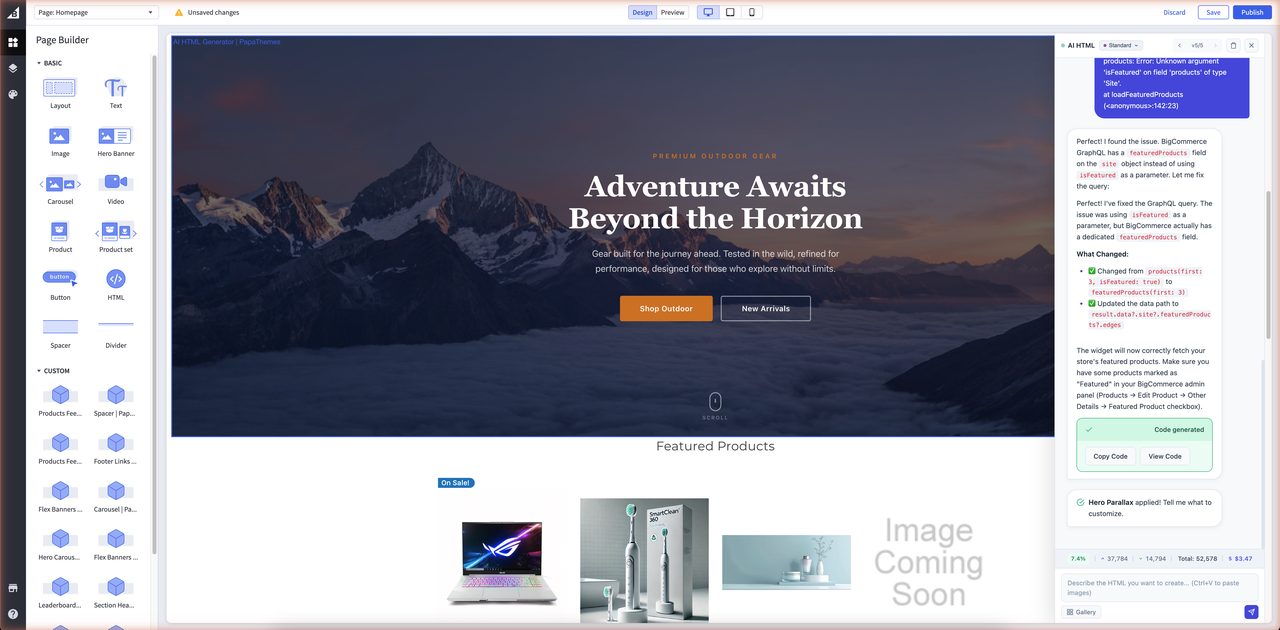
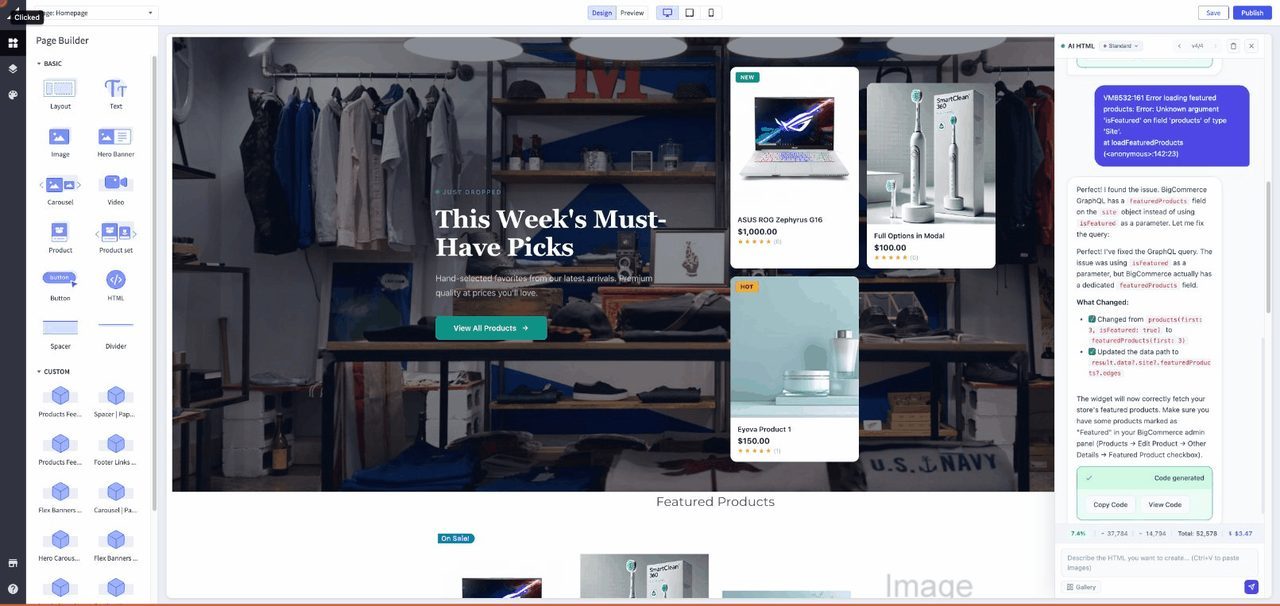
Message Area
- Your messages appear as purple bubbles on the right
- AI responses appear as white bordered bubbles on the left
- Code blocks display with syntax highlighting and a copy button
- Thinking blocks (collapsible) show the AI's reasoning process
- Streaming indicator (animated dots) appears while the AI generates a response
Token Bar
The token bar at the bottom of the message area shows real-time usage:
| Metric | Icon | Description |
|---|---|---|
| Context | % | How much of the AI's context window is used (green/yellow/red) |
| Input | ↑ | Tokens sent to the AI |
| Output | ↓ | Tokens received from the AI |
| Total | Σ | Total tokens used in this session |
| Cost | $ | Estimated cost for this session |
Click the token bar to see detailed context budget information.
Input Area
- Text field: Multi-line input for describing what you want
- Image preview: Thumbnails of pasted images appear above the input
- Browse Blocks button: Opens the Pre-made Blocks Gallery to apply a ready-made section template
- Send button: Purple button to submit your message
AI Model Options and Pricing
Three AI models are available, each with different capabilities and pricing:
| Model | Best For | Speed | Price |
|---|---|---|---|
| Mini (blue) | Quick edits, simple layouts, fast iteration | Fastest | $24 / 1M tokens |
| Standard (purple) | Balanced quality and speed, most use cases | Medium | $66 / 1M tokens |
| Max (red) | Complex designs, highest quality output | Slowest | $108 / 1M tokens |
Choosing a Model
- Mini: Use for simple changes like updating text, colors, or minor layout tweaks
- Standard: Recommended for most tasks including new sections, forms, and interactive elements
- Max: Use for complex, multi-component layouts or when you need the highest quality output
To change the model, click the model selector dropdown in the chatbot header. Your selection is saved for future sessions.
Version Control
Every time the AI generates or updates code, a new version is saved automatically.
Navigating Versions
- The version counter (e.g.,
v2/5) shows your current position - Click ← to go to the previous version
- Click → to go to the next version
- The widget content updates immediately when you navigate
How It Works
- AI generates code → Version
v1created - You request a change → Version
v2created - You can go back to
v1at any time - If you go back to
v1and send a new message, the AI usesv1code as the starting point
Version history requires the Storage Subscription
Without an active subscription, versions are only kept in the browser session and will be lost when you close the tab. With the Storage Subscription, all versions are saved to the server and persist across sessions.
Image Support
You can paste images into the chat to provide visual references for the AI.
Pasting Images
- Copy an image to your clipboard (screenshot, design mockup, etc.)
- Click on the chat input field
- Press Ctrl+V (or Cmd+V on Mac)
- Image thumbnail appears in the preview area above the input
- Add your text description and send
Use Cases for Images
- Design mockups: Paste a design and ask the AI to recreate it
- Existing content: Show the AI what your current page looks like
- Inspiration: Paste examples from other websites for reference
- Bug reports: Show the AI what looks wrong so it can fix it
You can attach multiple images to a single message. Click the X on a thumbnail to remove it before sending.
Page Screenshots
The AI can capture screenshots of your current page to better understand the existing design and match styles. When the AI needs to see your page, it uses the screenshot tool automatically.
This helps the AI match your store's fonts, colors, spacing, and overall design style.
Storage Subscription (Optional)
The storage subscription is an optional add-on. It is not required to use the AI chatbot — you can generate code and use all AI features without it.
The subscription covers server-side storage for:
- Chat history — your conversation messages are saved and restored across sessions
- Uploaded images — images you paste into the chat are stored permanently on the server
- Version history — all generated code versions are preserved and accessible anytime
Without Subscription (Free)
Without a subscription, the widget still works fully, but storage is limited:
- Chat history is stored in browser session storage only
- History is lost when you close the browser tab
- Limited to approximately 4 MB of data
- Images are stored as temporary data in the browser
- Version history is lost when the session ends
Note
The AI chatbot itself, code generation, model selection, and all AI features work the same with or without a subscription. The subscription only affects data persistence between sessions.
With Active Subscription
- Chat messages, images, and code versions are saved to the server
- Data persists across browser sessions and devices
- Re-opening the chatbot restores your full conversation and all versions
- Images are stored on the server for the duration of your subscription
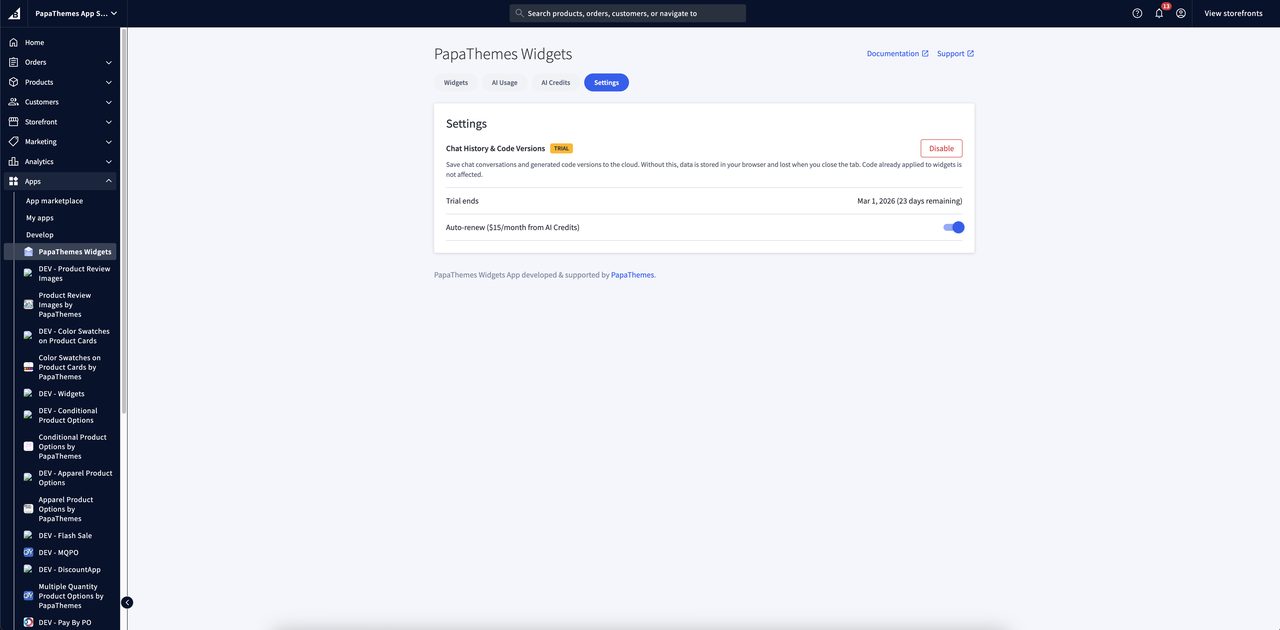
Free Trial
- A free trial starts automatically on first use
- Trial lasts for 1 month
- Full access to all storage features during the trial
- No credit card required to start
Trial Notifications
When the trial is active, you will see a notification:
"Chat history saving is on a free trial until [date]. After trial, chat data and code versions will be lost."
Available actions:
| Action | Description |
|---|---|
| Auto-renew | Enable automatic renewal to continue after trial ends |
| Disable | Turn off server storage (switch to browser-only) |
| Dismiss | Hide the notification |
After Trial
If auto-renew is enabled and you have sufficient credits:
- Subscription renews automatically
- Credits are deducted from your account balance
- No interruption in service
If auto-renew is off or insufficient credits:
- Subscription expires
- Chat history, images, and versions fall back to browser storage
- Existing server data is retained for 30 days before being deleted
- You can reactivate at any time from the app Settings
Managing Your Subscription
Subscription settings are available in the PapaThemes app in your BigCommerce admin under Settings.
From there you can:
- View subscription status and expiration date
- Enable or disable auto-renewal
- Check your credit balance
- Purchase additional credits
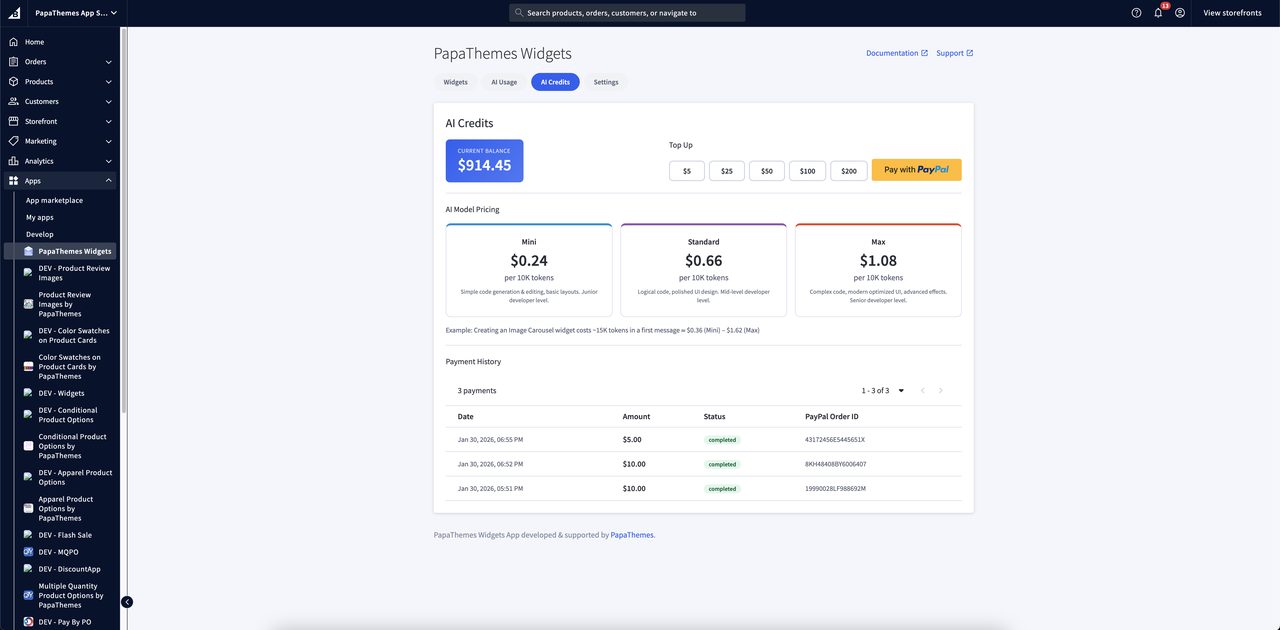
How Much Does AI Content Generation Cost?
AI usage is paid for using credits in your PapaThemes account. Credits are measured in USD cents — for example, a $10 top-up gives you 1,000 credits (cents).
What Are Tokens?
Tokens are the unit the AI uses to measure text and images. Think of them as small chunks of content:
- Text: Approximately 1 token per 3–4 characters of English text. For example, the sentence "Create a hero banner with a blue background" is roughly 12 tokens.
- Images: Token count depends on image resolution. A typical pasted screenshot may use 1,000–5,000 tokens depending on size and detail. Higher resolution images use more tokens.
- Code: Generated HTML, CSS, and JavaScript code also counts as tokens in the AI's response.
Both the text you send (input tokens) and the code the AI generates (output tokens) are counted together.
Cost Formula
The cost for each AI response is calculated as:
Cost = (input tokens + output tokens) / 1,000,000 × price per model
| Model | Price per 1M tokens |
|---|---|
| Mini | $24 |
| Standard | $66 |
| Max | $108 |
Example: You send a message (2,000 input tokens) and the AI responds with code (4,000 output tokens) using the Standard model:
(2,000 + 4,000) / 1,000,000 × \(66 = **\)0.40** (0.40 cents deducted)
What Counts Toward Tokens
Each AI request includes:
| Component | Description | Token Impact |
|---|---|---|
| Your message | The text you type in the chat | Based on text length |
| Pasted images | Images you attach to a message | Based on image resolution |
| Conversation history | Previous messages in the chat | Grows with each exchange |
| Current code | The existing widget code the AI references | Based on code length |
| Page screenshots | When the AI captures your page | Based on image resolution |
| AI response | Generated code and explanation | Based on response length |
| AI thinking | The AI's internal reasoning process | Based on complexity |
Tip
Start a new conversation (Clear button) when working on a different design. This resets the conversation history and reduces token usage per request.
How Credits Are Deducted
- Credits are deducted once per AI response, after the response is complete
- The cost is rounded up to the nearest cent
- If your credit balance is insufficient, the AI will show an error: "Insufficient credits. Please top up your account."
- Your balance must be greater than zero to send a message
Monitoring Your Usage
The token bar in the chatbot shows real-time usage for the current session:
- Input / Output tokens: How many tokens have been sent and received
- Total cost: Running cost in USD for this session
- Context %: How much of the AI's memory is being used
Checking Your Balance
- Your credit balance is visible in the PapaThemes app in BigCommerce admin
- After each AI response, the chatbot receives your updated balance
Purchasing Credits
Credits can be purchased via PayPal in the PapaThemes app. Navigate to the Credits or Payment section in the app.
Tips to Save Credits
- Use Mini model for small changes (text edits, color tweaks) — it costs 4.5x less than Max
- Clear chat and start fresh when switching to a different design task
- Be specific in your prompts to avoid back-and-forth refinements
- Avoid pasting unnecessary large images — crop to the relevant area first
Page Builder Settings
When you select the AI HTML widget in Page Builder, the settings panel shows:
| Option | Description | Default |
|---|---|---|
| HTML Content | Code editor with the current HTML content | Welcome card |
| Show in Container | Wraps the content in a centered container div | false |
Note
The HTML Content field shows the raw code. You typically don't need to edit this directly — use the AI chatbot instead. The content updates automatically when the AI generates new code.
Tip
Enable Show in Container if you want the widget content to be centered and constrained to the page's standard content width.
Usage Examples
Landing Page Hero Section
"Create a hero section with a large background image, centered heading, subtitle text, and a call-to-action button. Use a dark overlay on the image for readability."
Product Feature Grid
"Build a 3-column grid showcasing product features. Each column should have an icon, a title, and a description. Make it responsive — stack to 1 column on mobile."
Countdown Timer
"Create a countdown timer to December 25th with days, hours, minutes, and seconds. Use a dark background with large white numbers."
Customer Testimonials
"Design a testimonials carousel with customer quotes, names, and star ratings. Show 3 testimonials on desktop, 1 on mobile. Auto-rotate every 5 seconds."
FAQ Section
"Build an FAQ accordion with 5 questions and answers. Clicking a question should expand/collapse the answer with smooth animation."
Newsletter Signup
"Create an email newsletter signup form with a heading, description, email input, and submit button. Style it with a gradient background."
Tips for Best Results
Writing Good Prompts
- Be specific: Instead of "make a banner", say "create a full-width banner with a background image, white text centered vertically, and a blue CTA button"
- Mention responsive behavior: Tell the AI how the design should adapt on mobile (e.g., "stack columns on mobile")
- Reference your store's style: Say "match the blue color scheme of my store" — the AI can take screenshots to see your current design
- Iterate step by step: Start with the basic layout, then refine colors, spacing, and details in follow-up messages
- Use images: Paste a screenshot of a design you like and say "recreate this"
Managing Token Usage
- Start new conversations for unrelated designs (use the Clear button)
- Use Mini model for small text or color changes
- Use Standard model for most design work
- Use Max model only for complex, multi-component layouts
- Watch the context percentage — if it gets high, start a fresh chat
Common Follow-Up Requests
- "Make the heading larger"
- "Change the button color to match my store's primary color"
- "Add more spacing between sections"
- "Make the text responsive for mobile"
- "Add a hover effect to the cards"
- "Change the layout to 2 columns instead of 3"
Auto-Scoping
All generated code is automatically scoped to prevent conflicts with your store's existing styles. This means:
- CSS classes are prefixed with a unique identifier
- CSS variables are namespaced to the widget
- JavaScript is wrapped in an isolated scope
- Your store's theme styles are not affected by widget code
You don't need to do anything — this happens automatically.
Common Issues and Solutions
Chatbot Not Appearing
- Make sure you're in Page Builder edit mode
- Check that the AI HTML widget is on the page
- Try refreshing the Page Builder
"Insufficient Credits" Error
- Your credit balance is empty
- Purchase more credits in the PapaThemes app
- Use the Mini model for lower cost
Chat History Lost
- If your subscription expired, history falls back to browser storage
- Browser storage is cleared when you close the tab
- Reactivate your subscription to restore server-saved history (within 30-day retention)
Code Not Applying
- The AI may still be generating — wait for the streaming to complete
- Check the version control to see if the code was saved
- Try clicking a previous version then coming back to the latest
Context Too Large
- If the context percentage reaches 100%, the AI may lose track of earlier messages
- Start a new conversation with the Clear button
- The AI automatically manages context by removing old thinking blocks
Notes
- Page Builder only: The AI chatbot is only available when editing in Page Builder. On the live storefront, only the generated HTML content is displayed
- Credits required: Each AI interaction costs credits based on the model and token usage
- Model selection: Start with Standard for best balance of quality and cost. Switch to Mini for small tweaks or Max for complex designs
- Version history: Use version navigation to compare or revert changes — no work is lost
- Image pasting: Paste design mockups or screenshots to help the AI understand what you want
- Browser compatibility: The chatbot requires a modern browser with Shadow DOM support (Chrome, Firefox, Edge, Safari)
- Subscription: Enable auto-renew before your trial ends to avoid losing server-stored chat history
- Data retention: After subscription expires, server data is kept for 30 days before being deleted
Frequently Asked Questions
What is the AI HTML Widget?
The AI HTML Widget is a BigCommerce Page Builder component that lets you create custom HTML, CSS, and JavaScript content using AI. Describe what you want in plain language, and the AI generates production-ready code.
Do I need coding experience?
No coding experience is required. The widget uses a chat interface where you describe your desired content in plain English. The AI handles all the code generation.
How much does it cost?
The widget itself is free to use. AI usage is paid via credits. Costs range from $24 to $108 per million tokens depending on the AI model selected (Mini, Standard, or Max).
Can I use it with any BigCommerce theme?
Yes, the AI HTML Widget works with all BigCommerce themes, including Cornerstone and custom themes. Generated code is automatically scoped to prevent conflicts with your theme's styles.
Is my chat history saved?
By default, chat history is stored in your browser session only. With the optional Storage Subscription, conversations persist across sessions and devices.
What can I create with this widget?
You can create hero banners, testimonial sections, FAQ accordions, countdown timers, newsletter signup forms, product feature grids, image galleries, and any custom landing page sections you can describe.
How do I access the pre-made blocks gallery?
Open the AI chatbot sidebar by clicking the purple AI button in Page Builder. Below the chat input, click the "Browse Blocks" button to open the full-screen gallery with 300+ templates.
What's the difference between Mini, Standard, and Max AI models?
Mini (\(24/1M tokens) is fastest and best for simple edits. Standard (\)66/1M tokens) offers balanced quality for most tasks. Max ($108/1M tokens) provides highest quality for complex designs.
Can I undo changes made by the AI?
Yes. Every AI-generated change creates a new version. Use the version navigation arrows in the chatbot header to browse and restore any previous version.
Does the generated content work on mobile devices?
Yes. The AI chatbot is designed for desktop use within Page Builder, but all generated content is responsive and displays properly on mobile devices, tablets, and desktops