Getting Started: Install the App & Add Widgets
This guide walks you through everything you need to start using PapaThemes Widgets: install the app, turn on the widgets you want, then drag, drop, and configure them in Page Builder. No coding required.
Before you begin
You need a BigCommerce store and access to your store's admin dashboard (control panel). The PapaThemes Widgets app must be added to your store from the BigCommerce App Marketplace first.
Step 1 — Open the app
In your BigCommerce admin dashboard, go to Apps → My Apps, then click the PapaThemes Widgets app to open it.
Step 2 — Install the widgets you want
Inside the app you'll see the Widget Manager — a list of every available widget with its installed version, the latest version, and an action button.
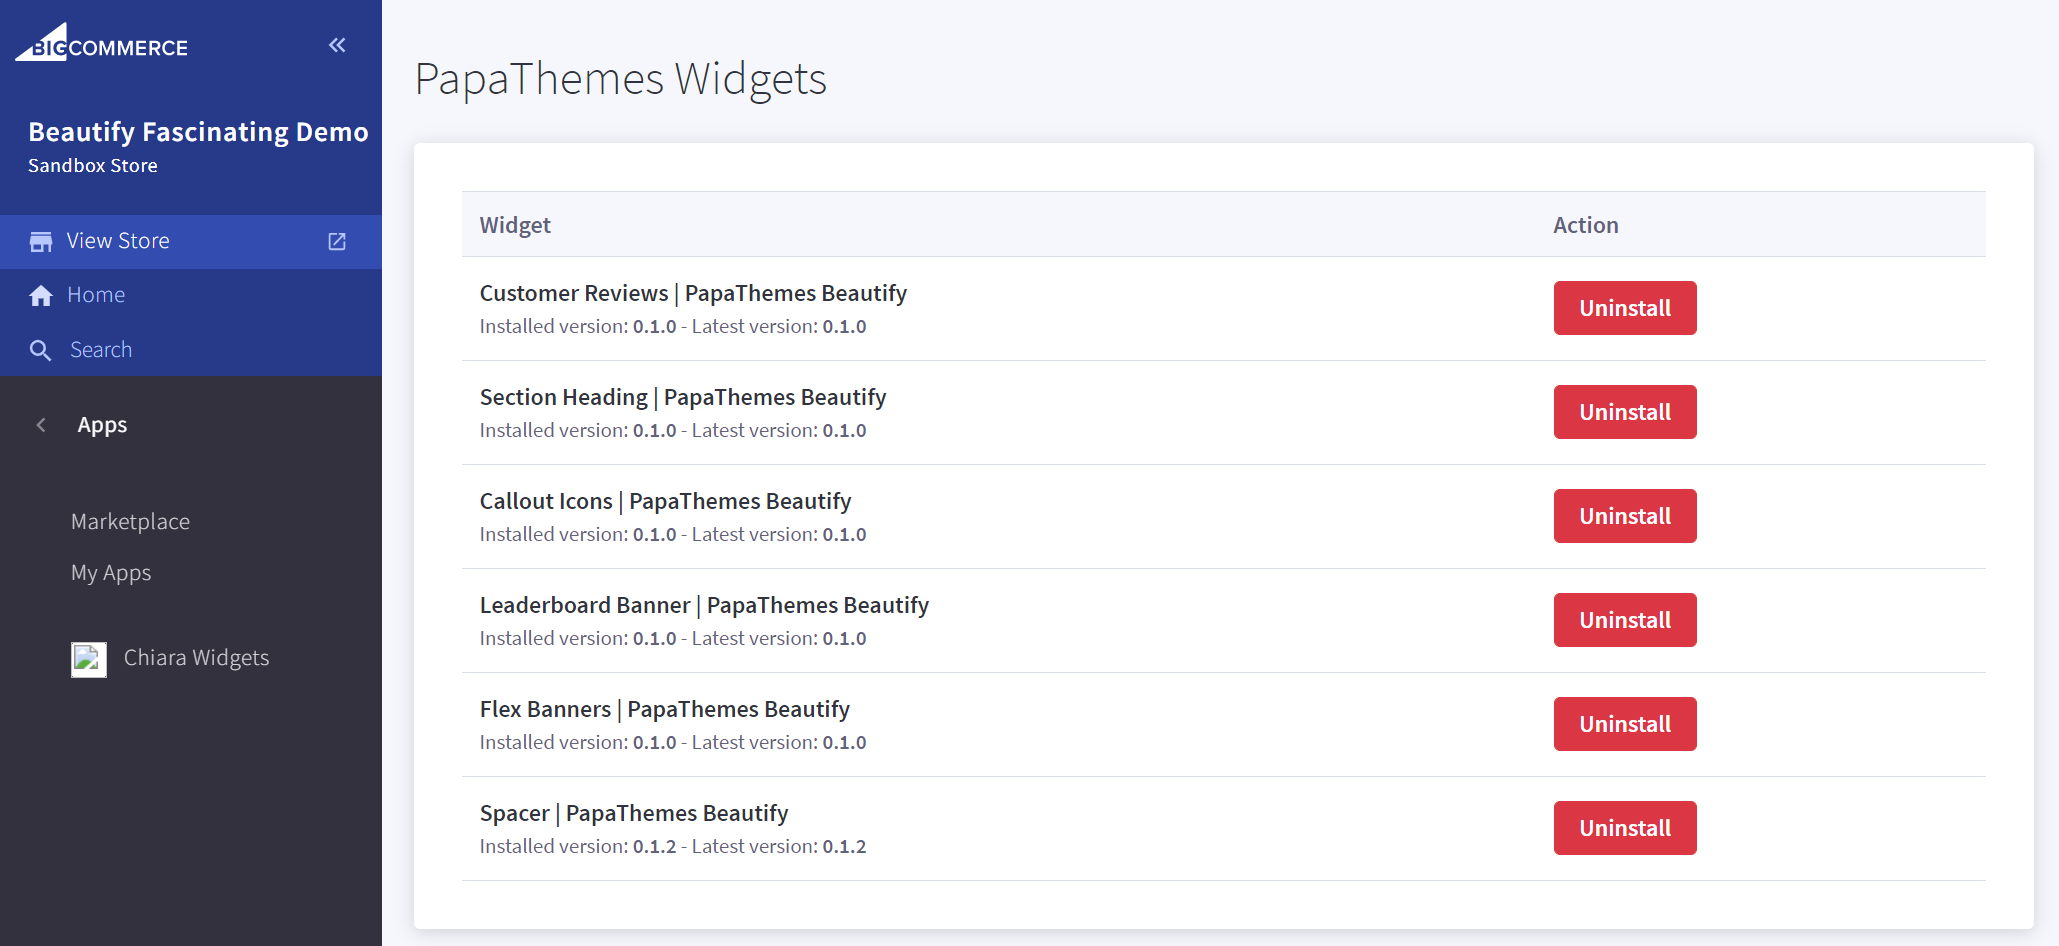
For each widget you can:
| Button | What it does |
|---|---|
| Install | Adds the widget to your store so it appears in Page Builder. |
| Upgrade | Updates an installed widget to the latest version (shown when a newer version is available). |
| Uninstall | Removes the widget from your store. |
Click the button next to each widget you want. You only need to install the widgets you plan to use — you can always come back and add or remove more later.
Keep widgets up to date
When the Latest version is higher than your Installed version, click Upgrade to get the newest fixes and features.
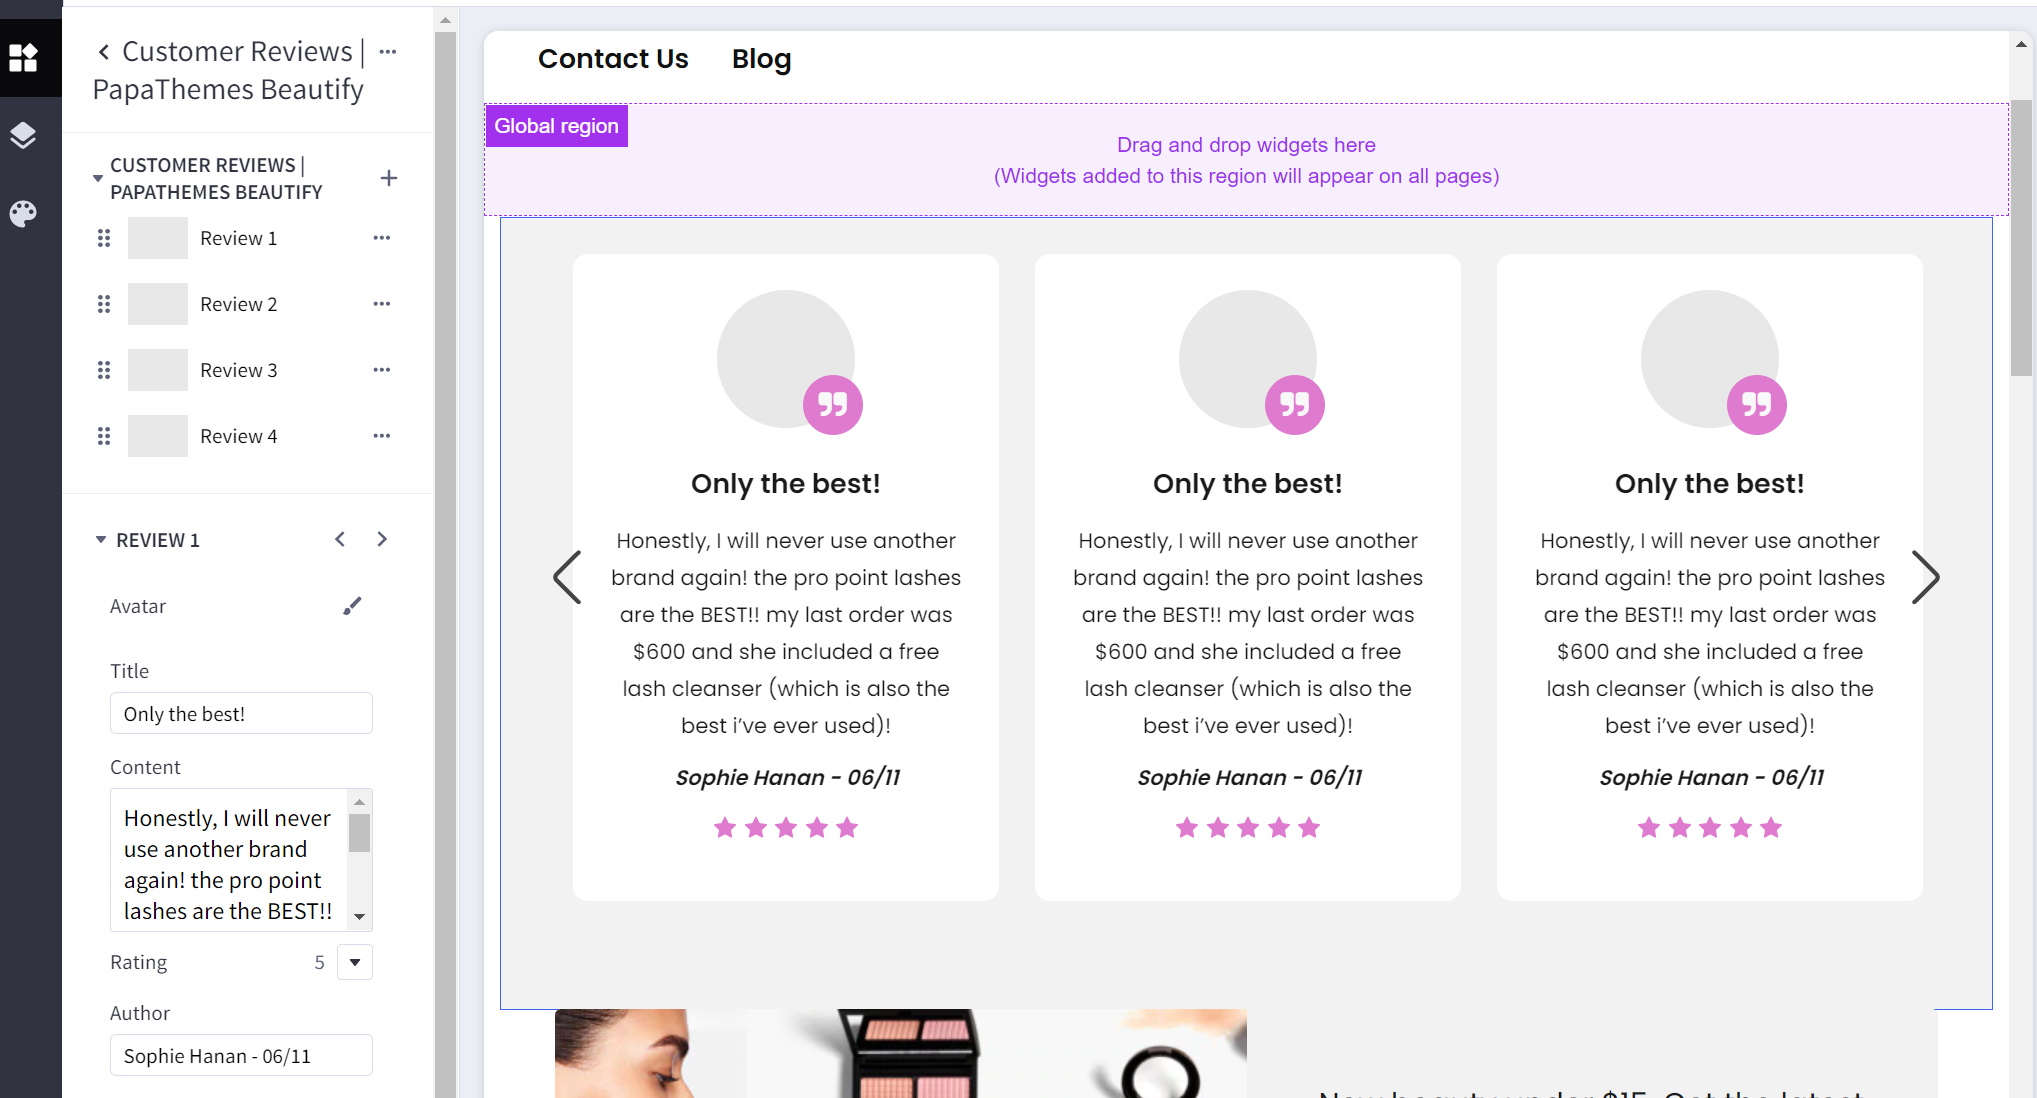
Step 3 — Add a widget to your page
Open Page Builder to preview your theme. In the left sidebar, on the Page Builder tab, the PapaThemes widgets now appear in their own group (look for the Custom widgets section).

Drag and drop any widget into an available region of your theme. The widget appears on the page right away with its default content, so you can see it immediately.
Step 4 — Configure the widget
Click the widget you just added. Its settings panel opens on the left sidebar, where you can change colors, fonts, spacing, content, and every other option for that widget. Edits preview live on the page as you make them.
Find the settings for each widget
Every widget's options are explained in detail on its own documentation page — see Basic Widgets, AI Widgets, Beautify Widgets, and the theme-specific sections in the menu.
Step 5 — Save and publish
When you're happy with the result:
- Click Save to keep your changes.
- Click Publish to make them live on your storefront.
Tips
Try it on a draft first
Page Builder lets you edit safely before publishing. Make your changes, preview on desktop and mobile, then publish once everything looks right.
- Install only the widgets you need — it keeps your widget list tidy.
- Widgets added to a global region (such as the header or footer area) appear on every page; widgets added to a specific page appear only there.
- Each widget is fully responsive, so preview both desktop and mobile views before publishing.